

These Hong Kong-style Pineapple Buns are delicate and pillowy with a crispy cookie topping, excellent with a cup of tea at breakfast or at any time of the day. Recipe with step-by-step pictures.

Pineapple Buns
A scrumptious deal with which I found a few years in the past in a Hong Kong bakery had been Pineapple Buns. On the time, I had no concept what they had been known as (the bakery solely had indicators in Chinese language), and whether or not they had been meant to be candy or savoury. I settled on them being a candy bun. However a couple of days later, a good friend took me to lunch at Cheung Hing Espresso Store the place I ordered a fried egg and spam roll and which, to my shock, was served in a Pineapple Bun. I used to be in heaven!
Like many Chinese language bakery treats, Pineapple Buns are scrumptious alongside a milky espresso at breakfast, or as a part of a light-weight meal all through the day. They style finest when they’re contemporary from the oven, and even higher when they’re selfmade 😊
What are Pineapple Buns?
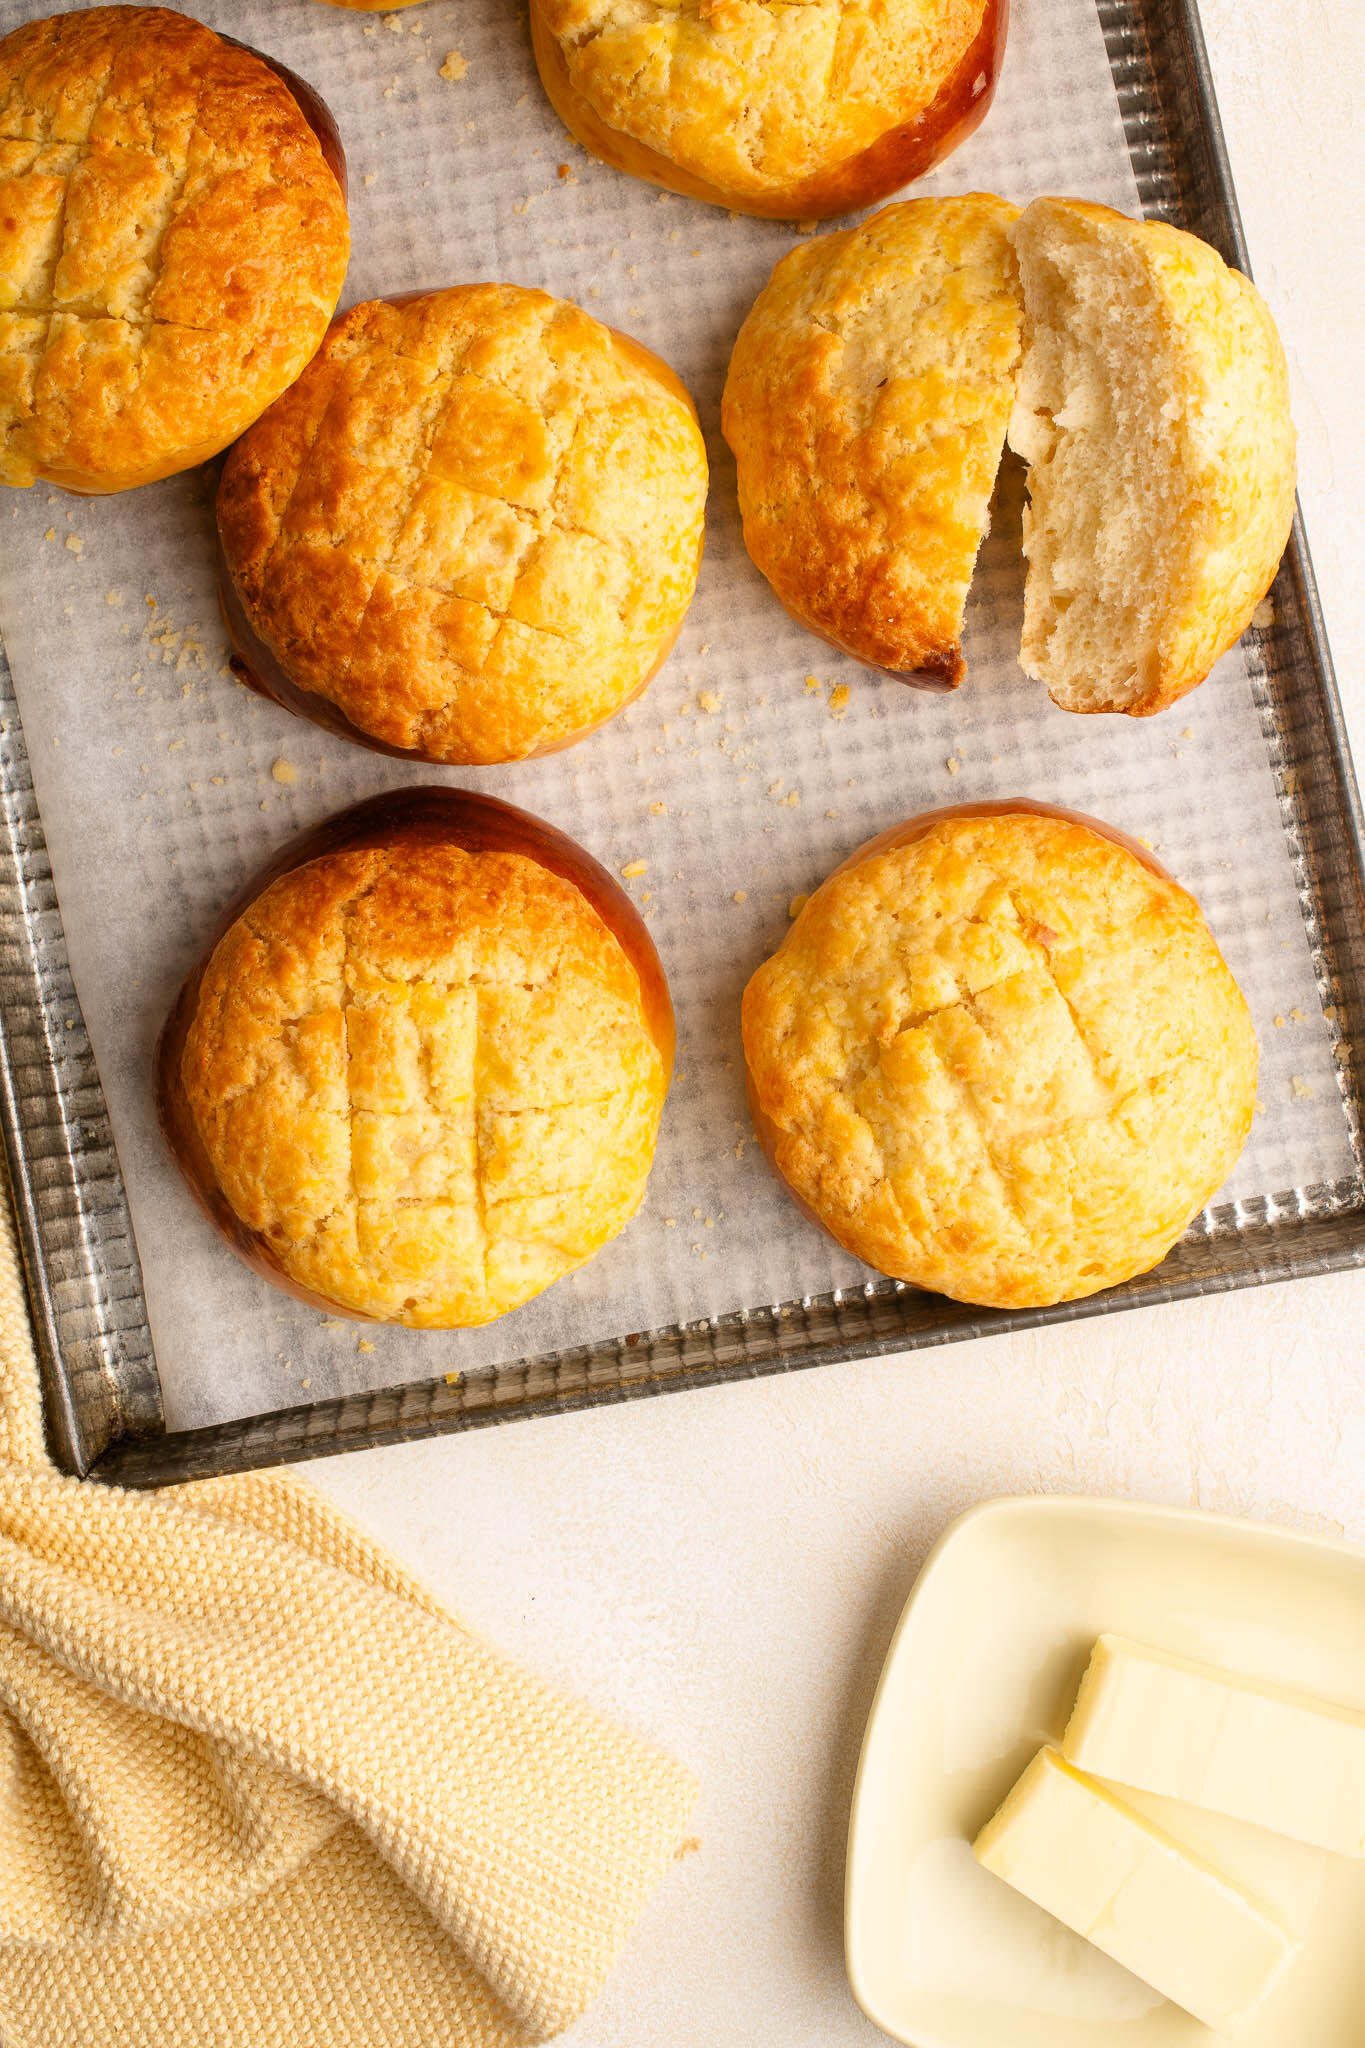
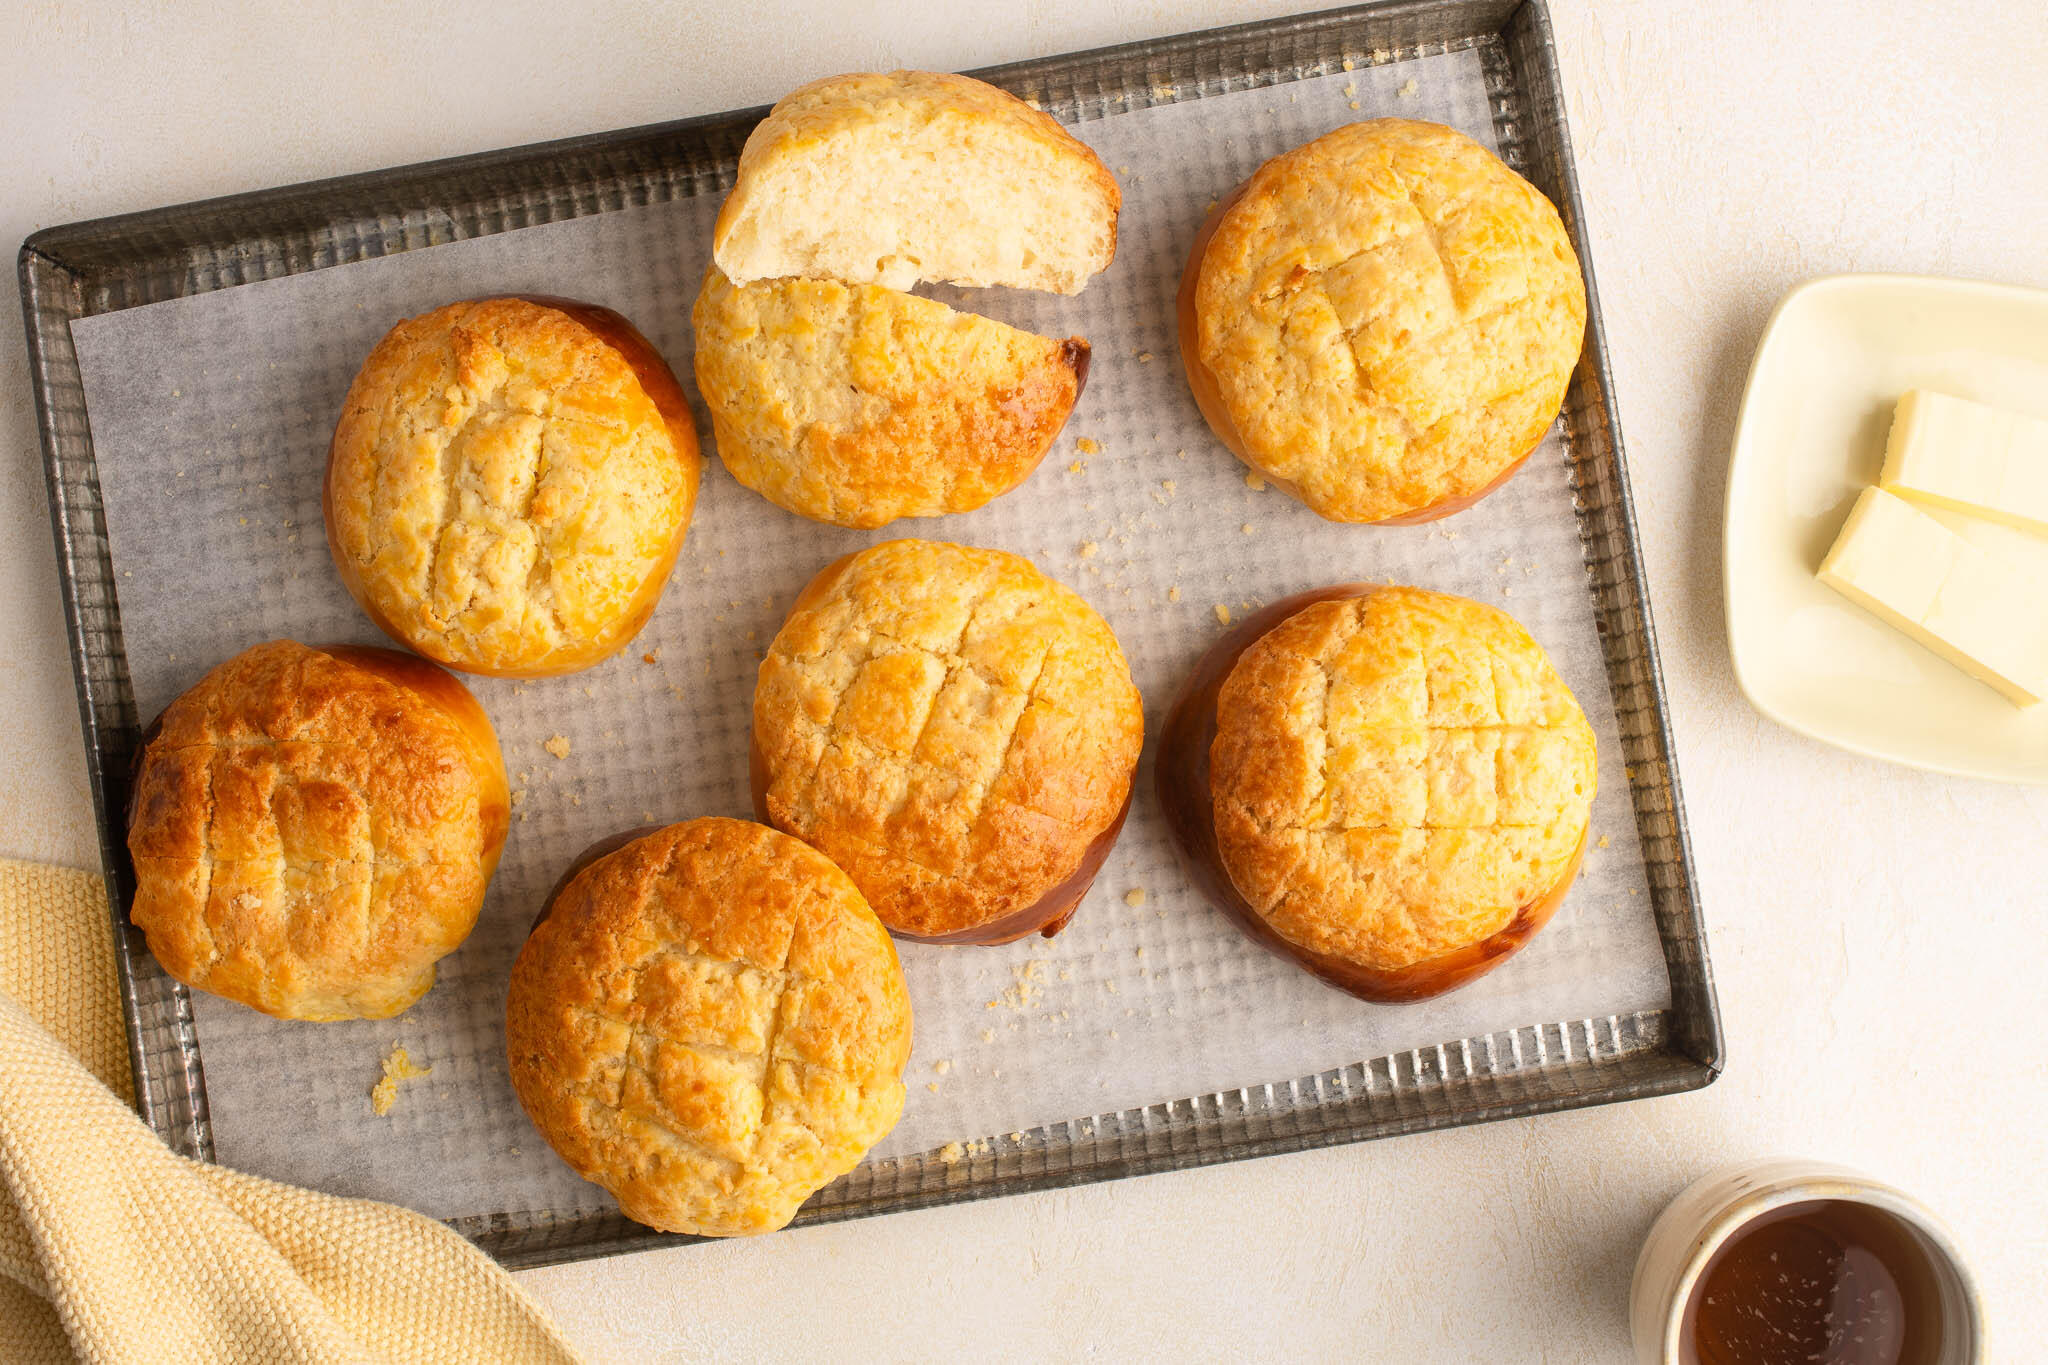
Pineapple Buns are Chinese language-style milk buns with a candy and crispy cookie topping which “cracks” upon baking to present the buns the looks of pineapples (in case you use your creativeness 😅). Opposite to its identify, they don’t comprise any pineapple in any respect.
What is exclusive a few Pineapple Bun is the textural mixture of a delicate chewy bun with a crispy cookie layer.
The Japanese have the same model known as Melon Pan, which additionally they make in various flavours, similar to matcha, chocolate, and even full of a vanilla custard.

The place to Purchase Pineapple Buns
If you’re fortunate sufficient to have a Chinese language bakery in your neighbourhood, attempt to purchase your Pineapple Buns on the day they’re baked, which is when the cookie topping is basically crispy. As Pineapple Buns can preserve for a number of days, many bakeries package deal them individually in plastic luggage to assist preserve them more energizing for longer.
On a current journey to Boston, we got here throughout Bao Bao Bakery & Cafe and I couldn’t resist popping in to see what scrumptious treats I may purchase for afternoon tea. I used to be completely happy to seize a few of the Pineapple Buns, in addition to their very scrumptious Egg Custard Tarts.

Sadly, there is no such thing as a Chinese language bakery in Zurich, however we’re very fortunate to have a couple of native Japanese bakeries, and Hiro Takahashi make scrumptious Melon Pan in several flavours.
Recipe for Pineapple Buns
My recipe for Pineapple Buns makes use of my recipe for Japanese Milk Buns, which I portion into 12 buns.
For the cookie topping, I discover it best to make the cookie topping far upfront and to maintain it chilled within the freezer. The cookie itself is a delicate and buttery dough which spreads and cracks upon baking. As soon as the cookie dough is frozen, it’s simpler to slice and likewise simpler to put on the buns simply earlier than baking.
To assist the buns obtain the pineapple look, you’ll be able to rating a crosshatch sample onto every cookie slice earlier than inserting them onto the buns. I occur to not thoughts the “pure” look and often go away the cookie slices as they’re. Even if you rating them upfront, typically the strains don’t actually present after baking.
The best way to Make Pineapple Buns
Make the Cookie Topping
Begin by making the cookie topping, because it wants time to agency up within the fridge or freezer. In case you observe my steps beneath to make the bread dough the evening earlier than, I might additionally advocate making the cookie dough the evening earlier than.
Cream the butter and sugar collectively till it’s mild and fluffy. I exploit an electrical stand mixer for this activity. Then add the remaining substances and beat till you may have a delicate and {smooth} dough.
Switch the dough to a sheet of plastic wrap, roll up the dough and safe each ends. Tighten the roll as you accomplish that to create a fats log of dough about 8 cm/3 inches in diameter.
Place the log of dough into the fridge or freezer to agency fully.


Make the Milk Buns
Step 1
Make the Tangzhong by whisking collectively the substances in a small saucepan. Place the saucepan over low warmth, and proceed whisking till the combination varieties a thick paste. You desire a thick sufficient consistency in order that, as you whisk the combination, the whisk leaves strains which don’t transfer.
Scrape the Tangzhong right into a small bowl and set it apart to chill. As soon as cooled, cowl the bowl with clingfilm and place it within the fridge in a single day.
If you’re in a rush, you should utilize the Tangzhong as quickly because it has cooled to room temperature. However leaving the Tangzhong in a single day permits it to develop extra flavour.
Step 2
Measure the flour, yeast, salt and sugar into the bowl of an electrical stand mixer. Frivolously combine the substances collectively.


Step 3
Add the Tangzhong. Use the dough hook to begin to incorporate the whole lot collectively. Slowly add the milk till a sticky dough begins to type. Then add the butter, one tablespoon at a time.
Step 4
Knead the dough on medium pace for 10-Quarter-hour till you may have a dough which passes the windowpane take a look at.
To carry out the “windowpane take a look at”, pinch off a small piece of dough, roll it right into a ball and use your arms to softly stretch the dough. If the dough can stretch to type a skinny sheet and be virtually translucent so as to see the sunshine by it, your dough has handed the “windowpane take a look at”. Because of this you may have kneaded the dough sufficiently and that the dough is able to be proofed.
At this stage, the dough can be considerably sticky and cheesy, largely due to the butter and excessive liquid content material. However the dough needs to be coming away from the edges of the bowl in the course of the mixing. As soon as the dough has had its first proofing, it is going to be much less sticky to the contact and simpler to deal with. If the dough is just too sticky and unimaginable to deal with, knead in a tablespoon of flour at a time till the dough is less complicated to deal with.


Frivolously oil a big mixing bowl. Roll the dough right into a smooth-ish ball and place it contained in the bowl.
Cowl with a clear tea towel, and set it apart someplace heat for about 1 to 1.5 hours, or till it has doubled in dimension.
Step 6
As soon as the dough has doubled in dimension, gently take away the dough from the bowl. The dough will deflate as you deal with it.


Step 7
Divide the dough into 12 equal parts (I like to recommend utilizing a digital kitchen scale). Roll every portion right into a {smooth} ball. You are able to do this by pinching the seams collectively to type a ball, after which roll the ball on the kitchen counter whereas cupping it together with your arms to make sure {smooth} sides throughout.
Place the balls of dough onto 2 giant baking trays lined with baking paper, spaced effectively aside.
Place the pan someplace heat for about 20 minutes, or till the buns have hyped up barely.
Step 8
Whereas the buns are proofing the second time, put together the cookie slices. Take away the log of cookie dough from the fridge or freezer, and lower 12 slices about 0.5 cm thick.
Place every cookie slice on a tray lined with baking paper.
If you wish to create the pineapple look on the buns, use the again of a knife or just like make a crosshatch sample on every cookie slice.
Ideally, the cookie slices needs to be chilly and agency if you place them onto the buns later, so in the event that they really feel slightly delicate, place the tray again into the fridge or freezer.


Step 9
As soon as the buns have hyped up properly, gently place a cookie slice on prime of every bun, taking care to not deflate the buns.
Step 10
Brush the cookie slice, in addition to the edges of the buns, with the overwhelmed egg yolk.
Place the tray of buns into an oven preheated to 180°C/356°F (with out fan). Bake for about 20 minutes, or till the buns are properly golden. Begin checking the buns at about 10-12 minutes and, if they’re browning too rapidly, place a sheet of foil over the buns for the rest of the baking time. The buns are cooked if an inside thermometer reads 85°C/185°F.


The best way to Eat Pineapple Buns
You’ll be able to eat Pineapple Buns simply as they’re, which work nice at breakfast or as a snack within the morning or afternoon.
In Hong Kong, it’s widespread to serve Pineapple Buns with a thick slice of chilly butter within the centre which melds into the delicate dough. A cup of milky sizzling tea on the facet can be a good suggestion.
And as I additionally found in Hong Kong, you’ll be able to serve the Pineapple Buns such as you would atypical buns with a spread of savoury fillings. My household take pleasure in consuming these buns with a beneficiant slather of salted butter and a few slices of ham or mortadella. Nevertheless, you’ll should be conscious that the buns are considerably candy, so you’ll be working with a novel sweet-salty mixture.
I believe the Pineapple Buns style the most effective when they’re nonetheless heat from the oven, and the cookie topping is sweet and crunchy. The topping will keep crunchy on the primary day, however it’ll soften when you begin to retailer the buns, which preserve for a number of days in a ziplock bag.
Ideas for Making Bread Dough Forward of Time
I really like baking bread, however I don’t love getting up additional early to get began on the dough. So I sometimes make the dough the evening earlier than and permit it to rise slowly within the fridge in a single day. The longer proofing time has the additional advantage of permitting the dough to develop extra flavour and a greater texture. Come the morning, the dough could have at the very least doubled in dimension, and it is going to be prepared for shaping as per the recipe.
To make the dough the evening earlier than:
- Make the dough as per the recipe.
- Place the dough into a big oiled bowl.
- Cowl the bowl with plastic wrap or a reusable bowl cowl.
- Place the bowl into the fridge.
- Let the dough rise in a single day, or for at the very least 8-10 hours.
- The following morning, the dough ought to have at the very least doubled in dimension.
- Gently take away the dough from the bowl.
- The dough is prepared for shaping and the second proof as per the recipe.
- Because the dough can be chilly from the fridge, the second proof could take barely longer.
Ideas for Making Pineapple Buns
- Begin the evening earlier than. In relation to making bread, I like to begin the day or evening earlier than, which feels extra environment friendly as a result of the dough can rise when you are sleeping, and the longer rising time additionally contributes to a greater flavour and texture.
- Freeze the cookie dough. Along with making the dough the evening earlier than, I additionally advocate making the cookie dough upfront, and maintaining it within the freezer in order that it is going to be simpler to slice and deal with.
- Embrace the cracks. Making the sort of bread already includes a number of steps, so remove steps which aren’t mandatory, similar to creating the crosshatch sample to realize a extra Instagram-worthy pineapple look. As a rule, I skip this step and no one notices anyway!
Pineapple Buns

- Resting Time: 2 hours
- Prep Time: 45 minutes
- Cook dinner Time: 25 minutes
- Complete Time: 1 hour 10 minutes
- Yield: 12 buns
- Class: Bread
- Methodology: Oven
- Delicacies: Chinese language
These Pineapple Buns are delicate and pillowy with a crispy cookie topping, excellent with a cup of tea at breakfast or at any time of the day. Recipe with step-by-step pictures.
Substances
For the Cookie Topping
For the Tangzhong
- 2 tablespoons robust white bread flour
- 100 ml (1/3 cup plus 1 tablespoon) milk
For the Japanese Milk Bread Dough
- 350 g (2 1/3 cups) robust white bread flour
- 3 g (1 teaspoon) on the spot dried yeast
- 1 teaspoon tremendous salt
- 55 g (1/4 cup) caster sugar
- 1 egg
- 125 ml (1/2 cup) milk, warmed to 37°C/98°F
- 50 g (1/2 stick) unsalted butter, softened
For the Eggwash
- 1 egg yolk
- sprint of water
Directions
For the Cookie Topping
- Place the butter and sugar in an electrical stand mixer with the flat paddle attachment.
- Cream the butter and sugar till it’s mild and fluffy.
- Add the egg and vanilla.
- Slowly add the dry substances.
- Maintain beating till the entire substances are totally included and you’ve got a delicate and {smooth} dough.
- Switch the dough to a big sheet of plastic wrap.
- Roll up the dough within the plastic and tighten the ends to supply a fats log of dough about 8 cm in diameter.
- Place the dough to sit back within the fridge for 1-2 hours, or till it’s fully agency.
For the Tangzhong
- Whisk the substances collectively in a small saucepan.
- Place the saucepan over low warmth.
- Maintain whisking till the substances type a thick paste. The consistency needs to be thick sufficient in order that as you whisk the combination, the whisk leaves strains within the combination which stays.
- Take away the paste to a small bowl, and set it apart to chill down.
To Make the Dough
- Measure the flour, yeast, salt and sugar into the bowl of an electrical stand mixer.
- Combine the dry substances collectively utilizing a dough hook.
- Add the egg and the cooled Tangzhong.
- Slowly add the milk till the combination comes collectively right into a sticky dough.
- Add the butter, one tablespoon at a time. Anticipate every tablespoon of butter to be totally included into the dough earlier than including the following.
- Proceed kneading the dough on medium pace for about 10-Quarter-hour, or till the dough passes the windowpane take a look at. (See Kitchen Notes beneath). By this stage, the dough also needs to be coming away from the edges of the bowl.
- Frivolously oil a big, clear mixing bowl.
- Roll the dough right into a {smooth} ball and place it into the blending bowl.
- Cowl the dough with a clear tea towel or bowl cowl, and place it someplace heat for about 1.5 hours, or till it has doubled in dimension.
To Portion the Dough
- Gently take away the dough from the bowl. The dough will deflate as you deal with it.
- Divide the dough into 12 equal parts. Use a digital scale for even-sized buns.
- Roll each bit of dough right into a {smooth} ball. I do that by pulling the sides of the dough into the centre, after which pinching these edges collectively whereas shaping the dough right into a {smooth} ball as you accomplish that. The pinched edges type the underside of the buns.
- Line 2 giant baking trays with baking paper.
- Place the formed buns into the lined baking pan, spaced effectively aside.
Proving the Formed Dough
- Place the pan someplace heat, coated with a clear tea towel, for about half-hour, or till the buns have virtually doubled in dimension.
To Form the Cookie Topping
- Take away the cookie dough from the fridge.
- Minimize the dough into 12 equal slices, about 0.5 cm thick.
- Place the cookie slices onto a baking tray lined with baking paper.
- You’ll be able to go away the cookie slices as they’re, or you should utilize the again of a knife or just like create a crosshatch sample on every cookie slice. The cookie will crack throughout baking, however making a crosshatch sample within the dough will assist to create the pineapple look.
- If the cookie slices really feel very delicate, you’ll be able to place the tray again within the fridge or freezer to agency up once more.
To Type the Pineapple Buns
- As soon as the buns have completed proofing, fastidiously place a cookie slice on prime of every bun. Take care to not deflate the buns as you accomplish that.
- Brush the buns throughout, together with the cookie slices, with the egg wash.
Baking the Pineapple Buns
- Preheat the oven to 180°C/356°F.
- Place a metallic baking tray on the center shelf.
- Bake the buns for about 20 minutes, or till they’re calmly golden. Verify the buns at about 10-12 minutes and, if they’re browning too rapidly, cowl the buns with a free sheet of foil for the remaining baking time.
- The buns are cooked if an inside thermometer reads 85°C/185°F.
- Depart the buns on the pan for about 5 minutes to agency up, earlier than fastidiously eradicating the buns to a wire rack to chill fully.
- Serve heat or at room temperature.
Kitchen Notes
 WINDOWPANE TEST
Pinch off a small piece of dough, roll it right into a ball and use your arms to softly stretch the dough. If the dough can stretch to type a skinny sheet and be virtually translucent so as to see the sunshine by it, your dough has handed the “windowpane take a look at”. Because of this you may have kneaded the dough sufficiently and that the dough is able to be proofed.
 MAKE AHEAD TIPS
To start out the Milk Bread dough the evening earlier than, make the dough as per the recipe. Place the bowl of dough (coated) within the fridge to proof in a single day, or for at the very least 8 to 10 hours. Throughout this time, it ought to have at the very least doubled in dimension. The following day, proceed with the remainder of the recipe. Because the dough can be chilly, it could require a bit extra time for the second proofing interval.
 DIFFERENT TYPES OF FLOUR
* For Swiss readers: I exploit Zopfmehl (or farine pour tresse) when making bread and enriched dough.
 DIFFERENT TYPES OF YEAST
* Please be aware that there’s a distinction between on the spot yeast (additionally known as on the spot dried yeast or fast-action dried yeast) and dried yeast (additionally known as energetic dry yeast). If you’re unsure what kind of yeast you may have, please examine the packaging for directions on tips on how to use the yeast.
* With on the spot yeast, you’ll be able to add it on to the flour combination with out having to activate it first.
* With dried yeast, you’ll need to activate it first (often in some heat liquid).
 PROOFING THE DOUGH
Dough wants a heat atmosphere for the yeast to activate and trigger the dough to rise. In case you don’t have a heat place in your house, attempt one of many following concepts:
* Within the oven with the oven mild switched on (works just for some ovens).
* Within the oven with a tray of boiling water on the underside shelf.
* Within the oven at a low temperature of about 25-30°C (77-86°F).
 OVEN & STOVE TEMPERATURES
All recipes on this web site have been examined on an induction range and/or with a typical oven (i.e. an oven with out fan). All recipes on this web site use temperatures for a standard oven, until in any other case talked about. Convection ovens (i.e. fan-forced ovens) are sometimes 20°C/70°F hotter than typical ovens, however please examine your producer’s handbook.
 CONVERSIONS
To transform from cups to grams, and vice-versa, please see this helpful Conversion Chart for Primary Substances.