

Delicate and fluffy cardamom buns crammed with marzipan and whipped cream. These Semlor buns are a decadent deal with for Shrove Tuesday! Recipe with step-by-step pictures.

Semlor
If you happen to love a great old school cream bun, you’ll love this Nordic model the place the buns are infused with recent cardamom, and crammed with an almond paste and freshly whipped cream. It’s an indulgent deal with historically eaten on Shrove Tuesday (also called Mardi Gras or Pancake Day), simply earlier than the beginning of Lent.
I first tried a Semlor bun after we visited Stockholm a few years in the past for New 12 months’s Eve, and I occurred to discover a bakery which was promoting Semlor buns in January (a lot to my sister-in-law’s dismay!). Very like a King’s Cake at Epiphany or Sizzling Cross Buns at Easter, there’s something particular about consuming these muffins within the week of the vacation itself, and never essentially within the months main as much as the occasion. However as I had at all times wished to attempt a Semlor, I used to be quite completely satisfied on this event to flout the foundations 😉
What are Semlor?
Semlor (Semla for singular) is the title for Swedish yeasted buns crammed with marzipan and cream, and that are historically eaten on Shrove Tuesday.
The Finnish additionally rejoice Lent with the identical buns (referred to as Laskiaispulla), however they sometimes fill their buns with strawberry jam or raspberry jam as an alternative of the almond paste.
Semlor are, actually, similar to Australian-style Cream Buns, however the very best Semlor are these made with the addition of recent cardamom within the dough for that distinct Nordic contact.
I’ve at all times cherished Cardamom Buns that are widespread all through Sweden, Denmark and Finland. And after visiting Finland in the summertime of 2024, the place I acquired to pattern many native baked treats with cardamom, I’m more than pleased to commerce a plain bun for one heady with cardamom.

Semlor Recipe
My recipe for Semlor is similar to my recipe for Cream Buns, however with the addition of recent cardamom within the dough.
A conventional Semlor is crammed with an almond paste, which is included in my recipe under. However a better model is to make use of strawberry jam or raspberry jam, like they do in Finland. Final yr, I experimented with a do-it-yourself pistachio paste which was completely scrumptious, so I’ve included the recipe for that under additionally.
If time is on my facet, I prefer to make a wide range of fillings, principally as a result of my children love these buns with jam most, while I really like the delicate sweetness of the marzipan.
If you’re not a fan of cardamom, you’ll be able to, after all, make the buns plain; this model exists too in Sweden.
Methods to Make Semlor
Step 1
Measure the flour, sugar, yeast, salt and cardamom into the bowl of an electrical stand mixer. Evenly combine the substances collectively.
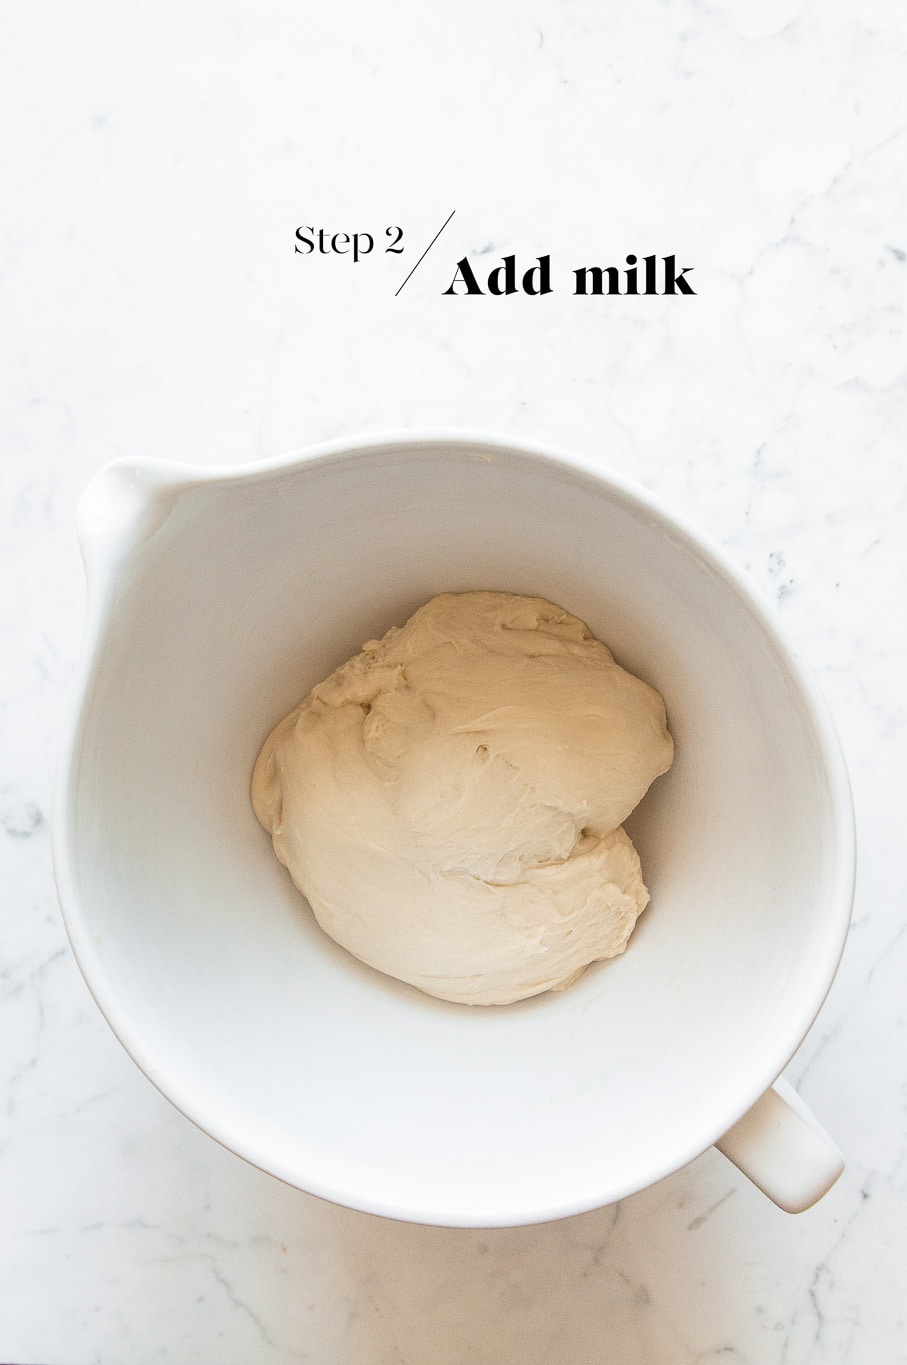
Step 2
Slowly add the nice and cozy milk (chances are you’ll not want all of it), and evenly beat all the pieces with the dough hook till it comes collectively into a big ball of dough. Solely add as a lot milk as it’s essential carry the substances collectively right into a dough.

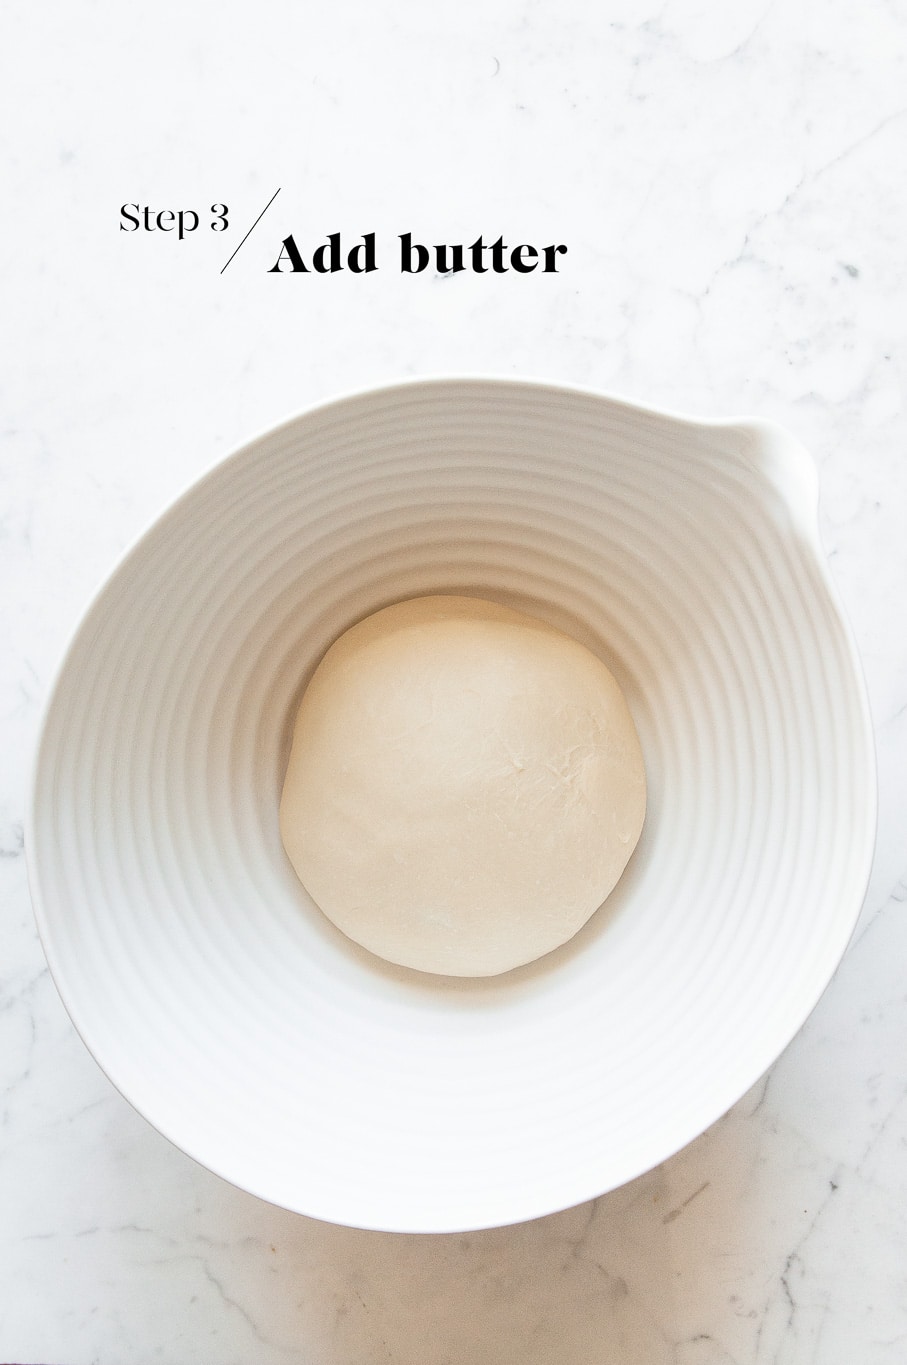
Step 3
Slowly incorporate the butter, one tablespoon at a time, till all the butter has been used.
Then enhance the pace to medium and proceed kneading with the dough hook for 15 to twenty minutes, or till the dough is easy and elastic.
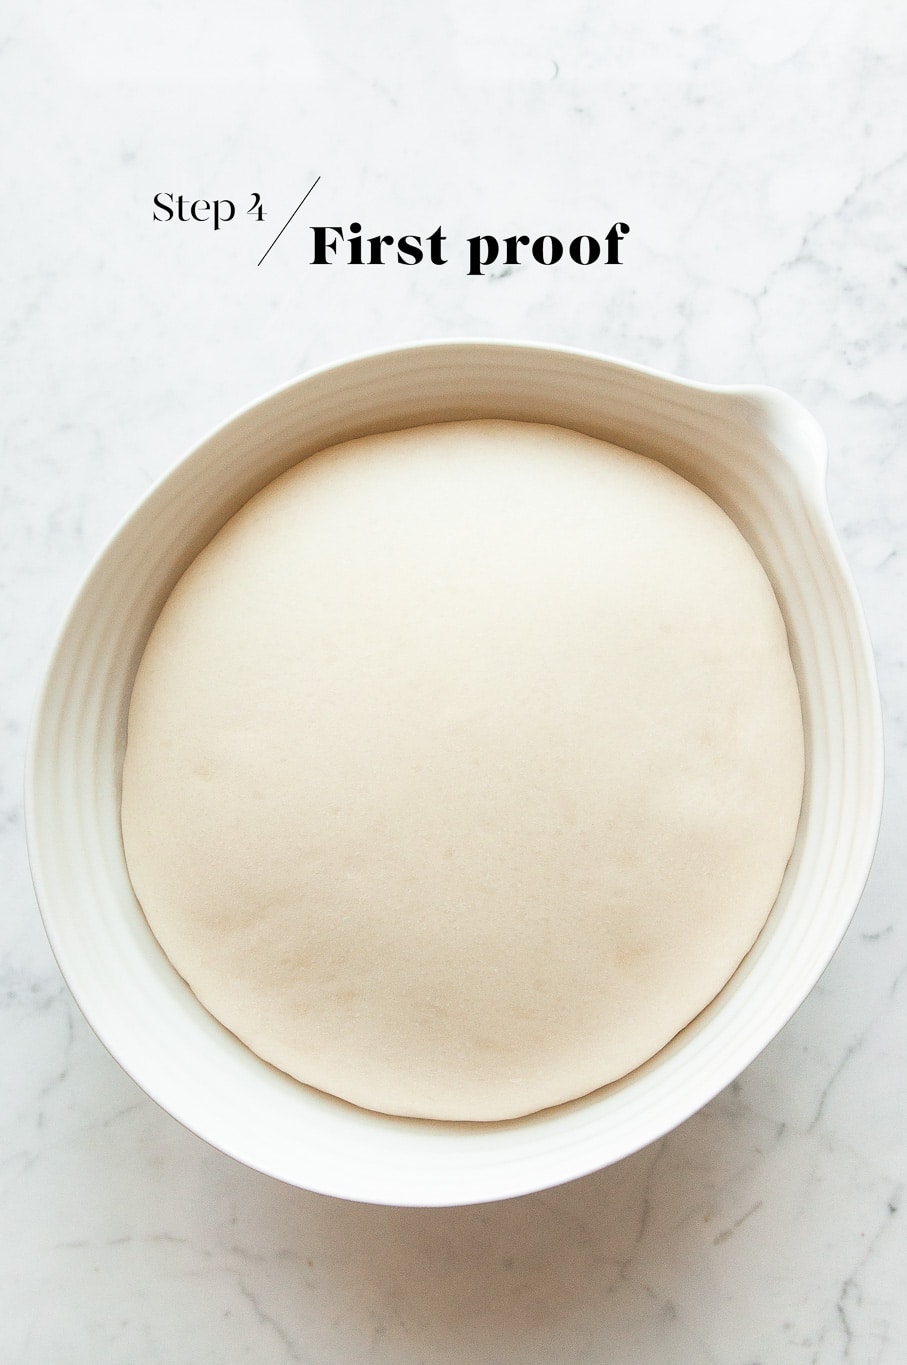
Step 4
Evenly oil a big mixing bowl, and place the dough into the bowl. Cowl the bowl with a clear tea towel and depart it someplace heat for 1 to 1.5 hours, or till the dough has doubled in dimension.
Step 5
As soon as the dough has doubled in dimension, gently take away the dough from the bowl. The dough will deflate as you deal with it.
Line a big baking tray with baking paper.
Weigh the dough, and divide this quantity by 12, after which portion every bit of dough.
Gently roll every bit of dough right into a spherical ball and place them onto the lined baking tray, spaced aside.
Step 6
Place the tray someplace heat for about half-hour, or till the buns have risen and puffed barely. (They are going to proceed to rise only a bit extra within the oven throughout baking.)
In the meantime, preheat the oven to 220°C (428°F).
As soon as your buns are able to bake, brush them with some egg wash.


Step 7
Bake the buns for about 25 minutes, or till the buns are evenly golden and cooked by way of. When you’ve got a digital thermometer, the interior studying must be at the least 85°C (185°F).
I like to recommend checking at about 10 minutes, and if the buns have already browned properly, place a chunk of foil over the buns to cease them from browning additional whereas they end baking.
Place the buns on a wire rack and allow them to cool utterly.
Step 8
In the meantime, make the marzipan by putting all the substances into the bowl of a meals processor, and blitz till you might have a easy paste. Switch the marzipan to a big bowl.
To make an almond marzipan, use finely floor blanched almonds. To make a pistachio marzipan, use uncooked pistachios.
Step 9
Slice about 1/3 off the highest of every bun. You possibly can depart the tops as they’re, or trim them right into a triangle form. Discard the trimmings.
Then use a knife or serrated spoon to create a cavity in the course of every bun, and scoop out this a part of the bun.
Roughly tear up the bun filling into the bowl of marzipan. Combine all the pieces along with sufficient milk to loosen the combination right into a spreadable paste.


Step 10
Place 1 tablespoon of marzipan filling into the cavity of every bun, and use the again of the spoon to unfold it evenly.
A substitute for marzipan filling is strawberry jam (as they do in Finland), and lemon curd can also be scrumptious. I usually make each almond marzipan and pistachio marzipan for a little bit of selection.
Step 11
Whip the cream till it’s thick with mushy peaks. Match a big piping bag with a star nozzle (optionally available), and fill the bag with the cream. Pipe the cream throughout every bun. Prime with the reserved triangle lids, and dirt evenly with icing sugar (powdered sugar).


Suggestions for Making Bread Dough Forward of Time
I really like baking bread, however I don’t love getting up further early to get began on the dough. So I sometimes make the dough the night time earlier than and permit it to rise slowly within the fridge in a single day. The longer proofing time has the additional advantage of permitting the dough to develop extra flavour and a greater texture. Come the morning, the dough may have at the least doubled in dimension, and will probably be prepared for shaping as per the recipe.
To make the dough the night time earlier than:
- Make the dough as per the recipe.
- Place the dough into a big oiled bowl.
- Cowl the bowl with plastic wrap or a reusable bowl cowl.
- Place the bowl into the fridge.
- Let the dough rise in a single day, or for at the least 8-10 hours.
- The following morning, the dough ought to have at the least doubled in dimension.
- Gently take away the dough from the bowl.
- The dough is prepared for shaping and the second proof as per the recipe.
- Because the dough will probably be chilly from the fridge, the second proof could take barely longer.


Semlor with Pistachio Marzipan
- Resting Time: 2 hours
- Prep Time: 60 minutes
- Prepare dinner Time: 25 minutes
- Complete Time: 1 hour 25 minutes
- Yield: Makes 12
- Class: Bread
- Technique: Oven
- Delicacies: Swedish, Finnish
Delicate and fluffy cardamom buns crammed with marzipan and whipped cream. A decadent deal with for Shrove Tuesday! Recipe with step-by-step pictures.
Substances
For the Buns
- 600 g (4 cups) robust white bread flour
- 110 g (1/2 cup) caster sugar
- 1 teaspoon advantageous salt
- 1 teaspoon cardamom seeds, freshly floor
- 14 g (4 teaspoons) immediate dried yeast (see Kitchen Notes under)
- 375 ml (1 1/2 cups) milk, warmed to 37°C (98°F)
- 60 g (4 tablespoons) butter, softened
For the Egg Wash
- 1 egg, evenly overwhelmed
- 1 tablespoon milk
For the Pistachio Marzipan
To Embellish
Directions
To Make the Dough
- Measure the flour, sugar, salt and yeast into the bowl of an electrical stand mixer.
- Evenly combine the substances collectively utilizing the dough hook.
- Slowly pour within the heat milk, and proceed mixing till all the pieces comes collectively right into a tough dough.
- Add the butter, one tablespoon at a time. As soon as the butter has been absolutely included into the dough, add the following tablespoon of butter.
- As soon as all the butter has been added, proceed kneading the dough on medium pace for about 15 to twenty minutes.
- The dough is prepared when it’s mushy and easy, and not sticks to the facet of the bowl. The dough will probably be considerably sticky from the butter.
First Proofing Session
- Evenly oil a big mixing bowl.
- Place the dough contained in the bowl.
- Cowl the dough with a clear tea towel, plastic wrap, or a reusable bowl cowl.
- Depart the dough someplace heat for 1 to 1.5 hours, or till the dough has doubled in dimension (see Kitchen Notes under).
To Form the Dough
- As soon as the dough has doubled in dimension, gently take away the dough from the bowl. The dough will deflate as you deal with it.
- Pat the dough right into a spherical form.
- Portion your dough into 12 equal items. When you’ve got some kitchen scales, weigh the dough after which divide this quantity by 12. This would be the weight of every bun dough.
- Line a big baking tray with a sheet of baking paper.
- Gently form every bit of dough right into a spherical ball.
- Place the balls of dough onto the lined baking tray, spaced aside.
For the Second Proofing Session
- Place the tray someplace heat for about half-hour, or till the buns have risen and hyped up barely.
- In the meantime, preheat the oven to 220°C/428°F (with out fan).
- Place a metallic baking tray in the course of the oven.
- Make the egg wash by evenly whisking collectively the egg and milk.
To Bake the Buns
- Brush the buns with some egg wash.
- Bake for about 25 minutes, or till the buns are evenly golden. Test the buns at about 10 minutes, and if they’re browning too shortly, cowl them with a free sheet of foil for the remainder of the baking time.
- The buns are cooked if an inner thermometer reads 85°C (185°F).
- Gently take away the buns (intact) to a wire rack, and depart them to chill utterly.
To Make the Marzipan
- Place all the substances into the bowl of a meals processor.
- Blitz till you might have a easy paste.
- Switch the paste to a big bowl and put aside.
To Assemble the Cream Buns
- Use a serrated knife to slice off about 1/3 off the highest of the buns.
- Lower the tops right into a triangle form by trimming the sides.
- Discard these edges however hold the triangle “lids”.
- Use a knife or serrated spoon to create a cavity in the course of every bun, and scoop out about 1/3 of every bun.
- With the bun dough which you might have scooped out, roughly tear them up into small items and add them to the bowl of marzipan.
- Use a spoon to combine the dough items into the marzipan, including as a lot milk as wanted to loosen the combination right into a spreadable paste.
- Place about 1 tablespoon of marzipan filling into the cavity of every bun, and use the again of a spoon to unfold it evenly.
- Whip the cream till you might have mushy peaks. Match a big piping bag with a star nozzle, and fill the bag with the cream. Pipe the cream on prime of the buns.
- Place the triangle lids on prime of every bun.
- Mud evenly with icing sugar (powdered sugar).
- Serve instantly.
Kitchen Notes
 WHAT TYPE OF CARDAMOM TO USE
* For the very best (and most genuine) outcomes, use freshly-ground cardamom seeds (additionally referred to as decorticated cardamom seeds). Merely grind them to a advantageous powder to make use of within the dough and filling. Use a extra coarse grind for sprinkling on prime of the wreath.
* Alternatively, use the same amount of normal floor cardamom, or add extra to style.
 MAKE AHEAD TIPS
To start out the dough the night time earlier than, make the dough as per the recipe. Place the bowl of dough (coated) within the fridge to proof in a single day, or for at the least 8 to 10 hours. Throughout this time, it ought to have at the least doubled in dimension. The following day, proceed with the remainder of the recipe. Because the dough will probably be chilly, it could require a bit extra time for the second proofing interval.
 DIFFERENT TYPES OF FLOUR
* For Swiss readers: I exploit Zopfmehl (or farine pour tresse) when making bread and enriched dough.
 DIFFERENT TYPES OF YEAST
* Please be aware that there’s a distinction between immediate yeast (additionally referred to as immediate dried yeast or fast-action dried yeast) and dried yeast (additionally referred to as lively dry yeast). If you’re undecided what sort of yeast you might have, please verify the packaging for directions on tips on how to use the yeast.
* With immediate yeast, you’ll be able to add it on to the flour combination with out having to activate it first.
* With dried yeast, you have to to activate it first (normally in some heat liquid).
* If you’re utilizing recent yeast, you have to about 1 block (40 g recent yeast = 14 g immediate dried yeast). Crumble the recent yeast into the nice and cozy milk, and stir to dissolve the yeast.
 PROOFING THE DOUGH
Dough wants a heat surroundings for the yeast to activate and trigger the dough to rise. If you happen to don’t have an oven with a setting to proof dough, or a heat place in your house, attempt one of many following concepts:
* Within the oven with the oven mild switched on (works just for some ovens).
* Within the oven with a tray of boiling water on the underside shelf.
* Within the oven or a steamer oven at a low temperature of about 25-40°C (77-104°F).
 OVEN & STOVE TEMPERATURES
All recipes on this web site have been examined on an induction range and/or with a typical oven (i.e. an oven with out fan). All recipes on this web site use temperatures for a standard oven, except in any other case talked about. Convection ovens (i.e. fan-forced ovens) are sometimes 20°C/70°F hotter than typical ovens, however please verify your producer’s handbook.
 CONVERSIONS
To transform from cups to grams, and vice-versa, please see this useful Conversion Chart for Fundamental Substances.